Takeoff w/ Toolbox |
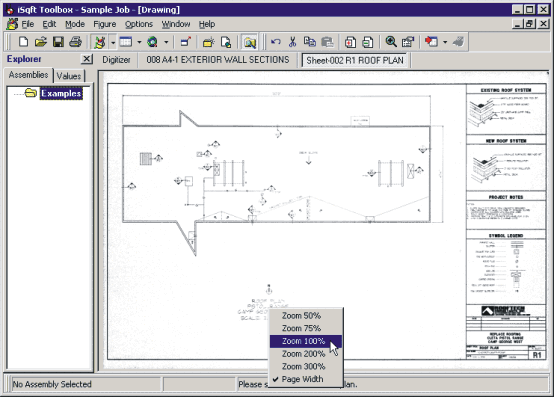
Now that we have a plan imported, the first thing we want to do is set the scale for the drawing. The zoom feature will help you locate the Scale on the drawing.
For this Roof Plan, the scale is located directly below the drawing. To zoom in and get a better view, simply right click where you would like to zoom in and choose one of the zoom options.

Once you are zoomed in, right click and hold the mouse button down. This will turn your mouse cursor into a little hand that will actually let you drag the plan around in any direction using your mouse.
Once you find the scale, look on the toolbar in the bottom left corner of your screen. You will see “No Assembly Selected” and directly to the right of that you will see “X: Y:”.
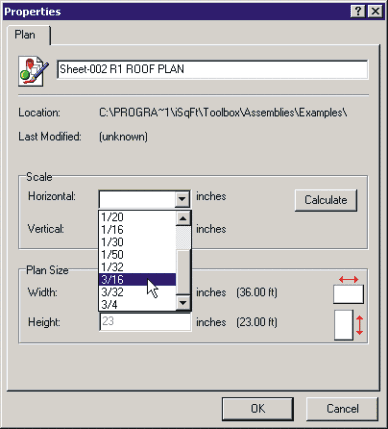
Click on X: Y: and you will see the Plan Properties window pop up. In the center section, you will see two dropdown boxes where you can set the scale for horizontal and vertical.
If you click on the drop down boxes you will see some pre-set scales already there. For this example, we need a 3/16 scale.

Once you set the scale, hit ok and this will take you back out to the drawing screen and you should see X: 3/16 Y: 3/16 down on your bottom toolbar now.
If you are still zoomed in, right click again and choose Page Width. This will zoom you back out to the original plan size.